“Precision in every measurement: Calibrate your conductivity meter for accurate results.”
Importance of Calibrating Your conductivity meter
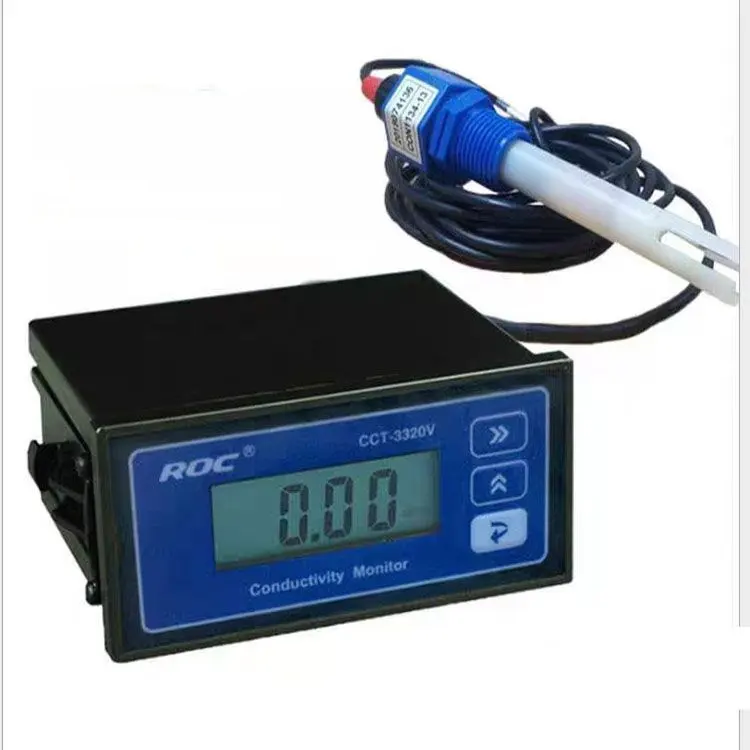
Calibrating your conductivity meter is a crucial step in ensuring accurate and reliable measurements. Conductivity meters are used in a variety of industries, including water treatment, food and beverage production, and scientific research. Without proper calibration, the readings from your conductivity meter may be inaccurate, leading to potential errors in your processes or experiments.
One of the main reasons why calibration is important is to ensure the accuracy of your measurements. Over time, conductivity meters can drift out of calibration due to factors such as temperature changes, exposure to contaminants, or general wear and tear. By calibrating your meter regularly, you can correct for any deviations and ensure that your readings are as precise as possible.

Calibration also helps to maintain the integrity of your data. In industries where conductivity measurements are critical for quality control or regulatory compliance, having accurate and reliable data is essential. By calibrating your meter, you can have confidence in the accuracy of your measurements and make informed decisions based on the results.
To calibrate your conductivity meter, you will need a calibration solution with a known conductivity value. This solution should be close to the expected conductivity range of the samples you will be measuring. It is recommended to use at least two calibration points to ensure the accuracy of your meter across a wider range of values.
To begin the calibration process, first rinse the conductivity cell with deionized water to remove any residue or contaminants. Then, immerse the cell in the calibration solution and allow it to stabilize for a few minutes. Once the reading on the meter has stabilized, adjust the calibration settings on the meter until it matches the known conductivity value of the calibration solution.
After calibrating at the first point, repeat the process with a second calibration solution of a different conductivity value. This will help to verify the accuracy of your meter across a wider range of values and ensure that it is properly calibrated for your specific needs.
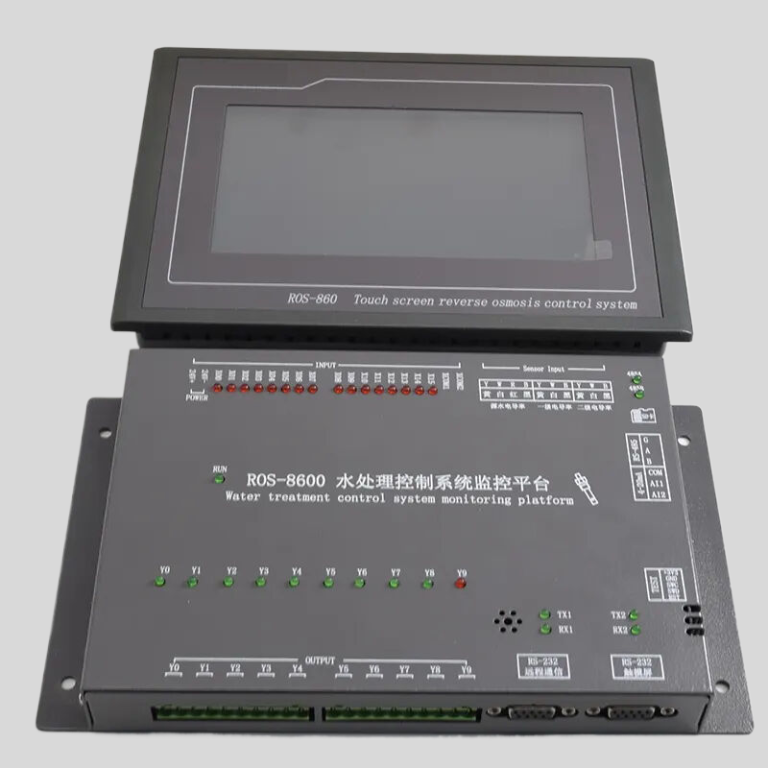
| ROS-360 Water Treatment RO Programmer Controller | ||
| Model | ROS-360 Single Stage | ROS-360 Double Stage |
| Measuring range | Source water0~2000uS/cm | Source water0~2000uS/cm |
| First level effluent 0~1000uS/cm | First level effluent 0~1000uS/cm | |
| secondary effluent 0~100uS/cm | secondary effluent 0~100uS/cm | |
| Pressure sensor(optional) | Membrane pre/post pressure | Primary/ secondary membrane front/rear pressure |
| Flow Sensor(optional) | 2 channels (Inlet/outlet flow rate) | 3 channels (source water, primary flow,secondary flow) |
| IO input | 1.Raw water low pressure | 1.Raw water low pressure |
| 2.Primary booster pump inlet low pressure | 2.Primary booster pump inlet low pressure | |
| 3.Primary booster pump outlet high pressure | 3.Primary booster pump outlet high pressure | |
| 4.High liquid level of Level 1 tank | 4.High liquid level of Level 1 tank | |
| 5.Low liquid level of Level 1 tank | 5.Low liquid level of Level 1 tank | |
| 6.Preprocessing signal | 6.2nd booster pump outlet high pressure | |
| 7.High liquid level of Level 2 tank | ||
| 8.Preprocessing signal | ||
| Relay output (passive) | 1.Water inlet valve | 1.Water inlet valve |
| 2.Source water pump | 2.Source water pump | |
| 3.Booster pump | 3.Primary booster pump | |
| 4.Flush valve | 4.Primary flush valve | |
| 5.Water over standard discharge valve | 5.Primary water over standard discharge valve | |
| 6.Alarm output node | 6.Secondary booster pump | |
| 7.Manual standby pump | 7.Secondary flush valve | |
| 8.Secondary water over standard discharge valve | ||
| 9.Alarm output node | ||
| 10.Manual standby pump | ||
| The main function | 1.Correction of electrode constant | 1.Correction of electrode constant |
| 2.TDS alarm setting | 2.TDS alarm setting | |
| 3.All working mode time can be set | 3.All working mode time can be set | |
| 4.High and low pressure flushing mode setting | 4.High and low pressure flushing mode setting | |
| 5.Manual/automatic can be chosen when boot up | 5.Manual/automatic can be chosen when boot up | |
| 6.Manual debugging mode | 6.Manual debugging mode | |
| 7.Spare parts time management | 7.Spare parts time management | |
| Expansion interface | 1.Reserved relay output | 1.Reserved relay output |
| 2.RS485 communication | 2.RS485 communication | |
| Power supply | DC24V±10% | DC24V±10% |
| Relative humidity | ≦85% | ≤85% |
| Environment temperature | 0~50℃ | 0~50℃ |
| Touch screen size | Touch screen size: 7 inches 203*149*48mm (Hx Wx D) | Touch screen size: 7 inches 203*149*48mm (Hx Wx D) |
| Hole Size | 190x136mm(HxW) | 190x136mm(HxW) |
| Installation | Embedded | Embedded |
It is important to calibrate your conductivity meter regularly, ideally before each use or at least once a month, depending on the frequency of use and the criticality of your measurements. Regular calibration will help to catch any drift or deviations early on and prevent any potential errors in your data.
| Model | RM-220s/ER-510 resistivity controller |
| Range | 0-20uS/cm; 0-18.25MΩ |
| Accuracy | 2.0%(FS) |
| Temp. Comp. | Automatic temperature compensation based on 25℃ |
| Oper. Temp. | Normal 0~50℃; High temp 0~120℃ |
| Sensor | 0.01/0.02 cm-1 |
| Display | LCD Screen |
| Communication | ER-510:4-20mA output/RS485 |
| Output | ER-510:High/Low limit dual relay control |
| Power | AC 220V±10% 50/60Hz or AC 110V±10% 50/60Hz or DC24V/0.5A |
| Working Environment | Ambient temperature:0~50℃ |
| Relative humidity≤85% | |
| Dimensions | 48×96×100mm(H×W×L) |
| Hole Size | 45×92mm(H×W) |
| Installation Mode | Embedded |
In conclusion, calibrating your conductivity meter is essential for ensuring accurate and reliable measurements in a variety of industries. By calibrating your meter regularly and using multiple calibration points, you can maintain the accuracy of your readings and have confidence in the integrity of your data. Make sure to follow the manufacturer’s guidelines for calibration and consult with a professional if you have any questions or concerns.