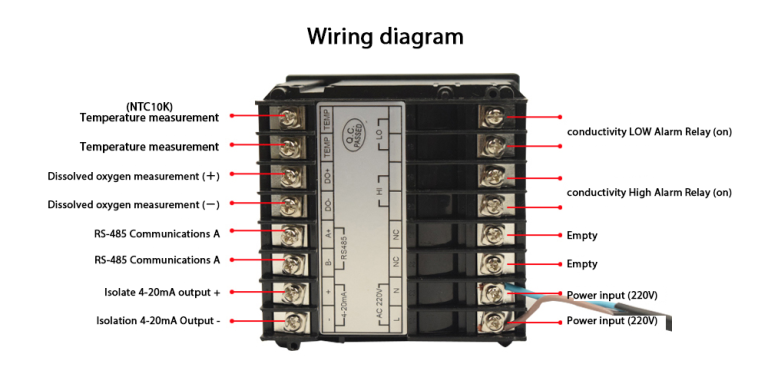
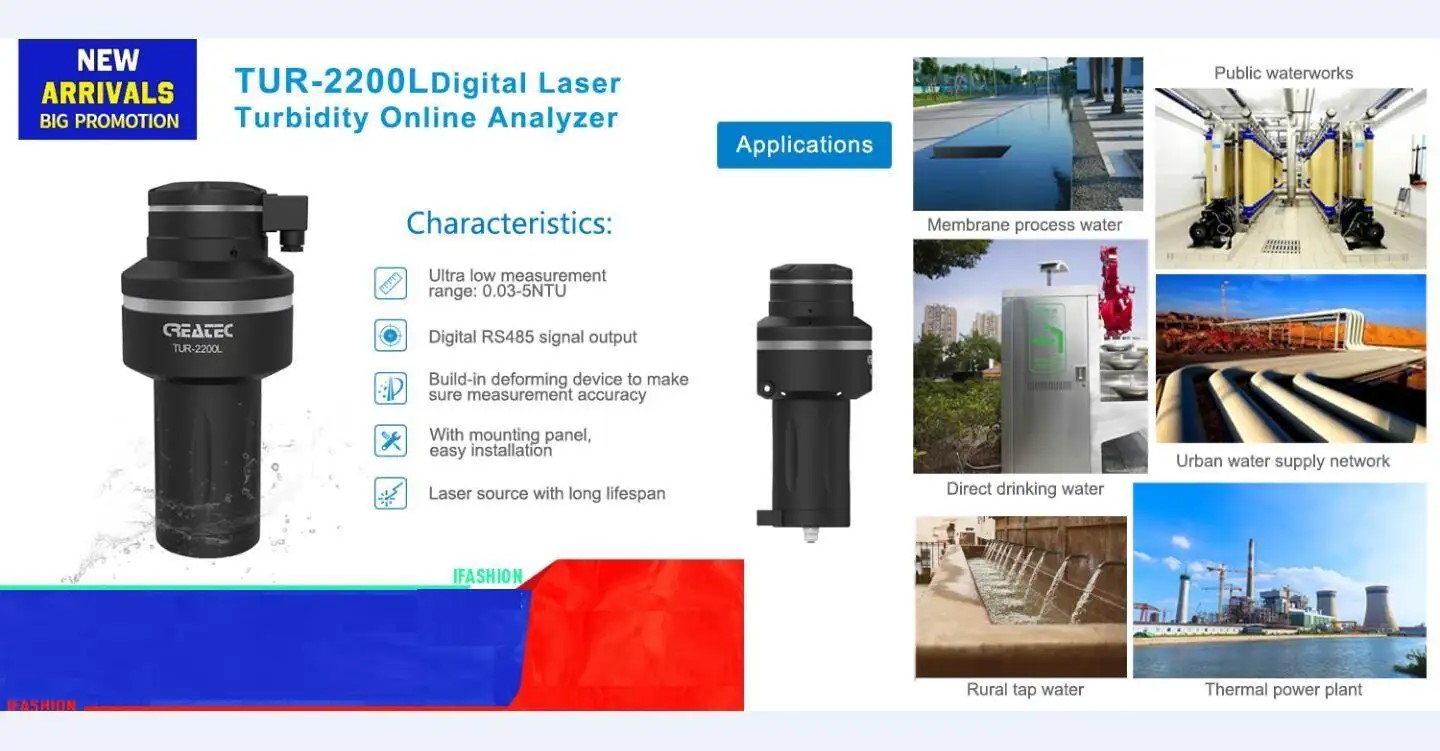
Understanding Turbidity and Its Importance in Water Quality
Turbidity is a key parameter used to measure the clarity of water. It refers to the cloudiness or haziness of a fluid caused by suspended particles that are invisible to the naked eye. These particles can include silt, clay, organic matter, and other debris. Turbidity is an important indicator of water quality as it can affect the health of aquatic ecosystems and the safety of drinking water.
In natural bodies of water, turbidity can be influenced by a variety of factors such as erosion, runoff from agricultural fields, and wastewater discharge. High levels of turbidity can reduce the amount of light that penetrates the water, which can impact the growth of aquatic plants and the ability of fish to find food. In drinking water, turbidity can be a sign of contamination and can provide a breeding ground for harmful bacteria and pathogens.
| ROS-8600 RO Program Control HMI Platform | ||
| Model | ROS-8600 Single Stage | ROS-8600 Double Stage |
| Measuring range | Source water0~2000uS/cm | Source water0~2000uS/cm |
| First level effluent 0~200uS/cm | First level effluent 0~200uS/cm | |
| secondary effluent 0~20uS/cm | secondary effluent 0~20uS/cm | |
| Pressure sensor(optional) | Membrane pre/post pressure | Primary/ secondary membrane front/rear pressure |
| ph sensor(optional) | —- | 0~14.00pH |
| Signal collection | 1.Raw water low pressure | 1.Raw water low pressure |
| 2.Primary booster pump inlet low pressure | 2.Primary booster pump inlet low pressure | |
| 3.Primary booster pump outlet high pressure | 3.Primary booster pump outlet high pressure | |
| 4.High liquid level of Level 1 tank | 4.High liquid level of Level 1 tank | |
| 5.Low liquid level of Level 1 tank | 5.Low liquid level of Level 1 tank | |
| 6.Preprocessing signal | 6.2nd booster pump outlet high pressure | |
| 7.Input standby ports x2 | 7.High liquid level of Level 2 tank | |
| 8.Low liquid level of Level 2 tank | ||
| 9.Preprocessing signal | ||
| 10.Input standby ports x2 | ||
| Output control | 1.Water inlet valve | 1.Water inlet valve |
| 2.Source water pump | 2.Source water pump | |
| 3.Primary booster pump | 3.Primary booster pump | |
| 4.Primary flush valve | 4.Primary flush valve | |
| 5.Primary dosing pump | 5.Primary dosing pump | |
| 6.Primary water over standard discharge valve | 6.Primary water over standard discharge valve | |
| 7.Alarm output node | 7.Secondary booster pump | |
| 8.Manual standby pump | 8.Secondary flush valve | |
| 9.Secondary dosing pump | 9.Secondary dosing pump | |
| Output standby port x2 | 10.Secondary water over standard discharge valve | |
| 11.Alarm output node | ||
| 12.Manual standby pump | ||
| Output standby port x2 | ||
| The main function | 1.Correction of electrode constant | 1.Correction of electrode constant |
| 2.Overrun alarm setting | 2.Overrun alarm setting | |
| 3.All working mode time can be set | 3.All working mode time can be set | |
| 4.High and low pressure flushing mode setting | 4.High and low pressure flushing mode setting | |
| 5.The low pressure pump is opened when preprocessing | 5.The low pressure pump is opened when preprocessing | |
| 6.Manual/automatic can be chosen when boot up | 6.Manual/automatic can be chosen when boot up | |
| 7.Manual debugging mode | 7.Manual debugging mode | |
| 8.Alarm if communication interruption | 8.Alarm if communication interruption | |
| 9. Urging payment settings | 9. Urging payment settings | |
| 10. Company name,website can be customized | 10. Company name,website can be customized | |
| Power supply | DC24V±10% | DC24V±10% |
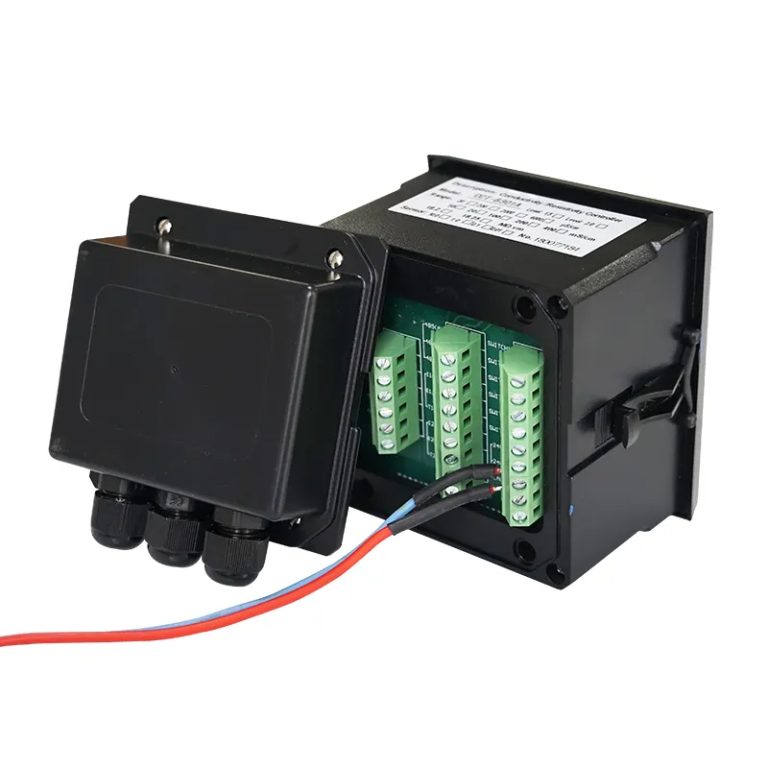
| Expansion interface | 1.Reserved relay output | 1.Reserved relay output |
| 2.RS485 communication | 2.RS485 communication | |
| 3.Reserved IO port, analog module | 3.Reserved IO port, analog module | |
| 4.Mobile/computer/touch screen synchronous display | 4.Mobile/computer/touch screen synchronous display | |
| Relative humidity | ≦85% | ≤85% |
| Environment temperature | 0~50℃ | 0~50℃ |
| Touch screen size | 163x226x80mm (H x W x D) | 163x226x80mm (H x W x D) |
| Hole Size | 7 inch:215*152mm(wide*high) | 215*152mm(wide*high) |
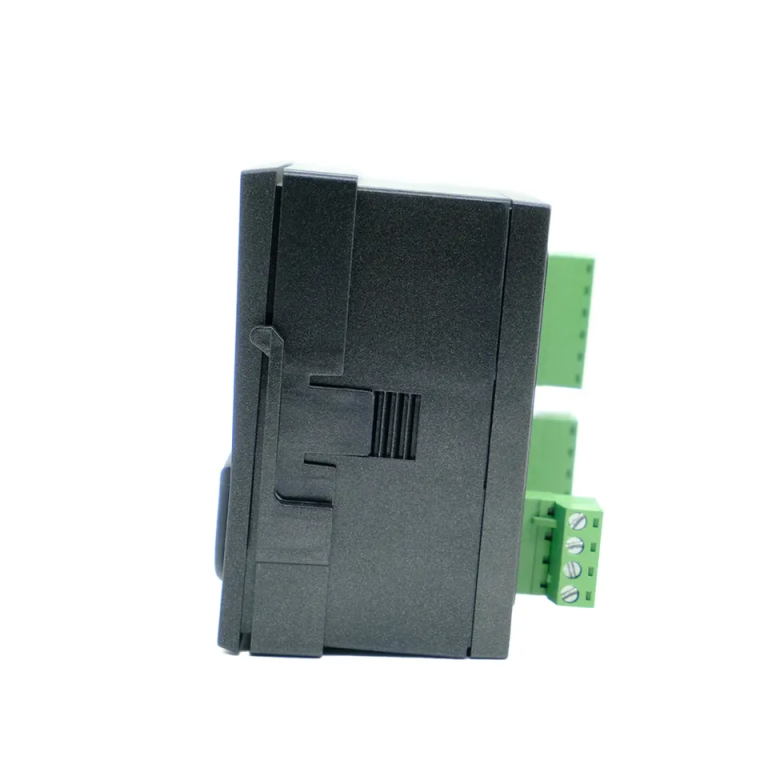
| Controller size | 180*99(long*wide) | 180*99(long*wide) |
| Transmitter size | 92*125(long*wide) | 92*125(long*wide) |
| Installation method | Touch screen:panel embedded; Controller: plane fixed | Touch screen:panel embedded; Controller: plane fixed |
To measure turbidity, a turbidity meter is used. Traditional turbidity meters rely on the principle of light scattering to determine the amount of suspended particles in a sample of water. However, these meters can be expensive and may not be easily accessible to everyone. This is where the Arduino comes in.
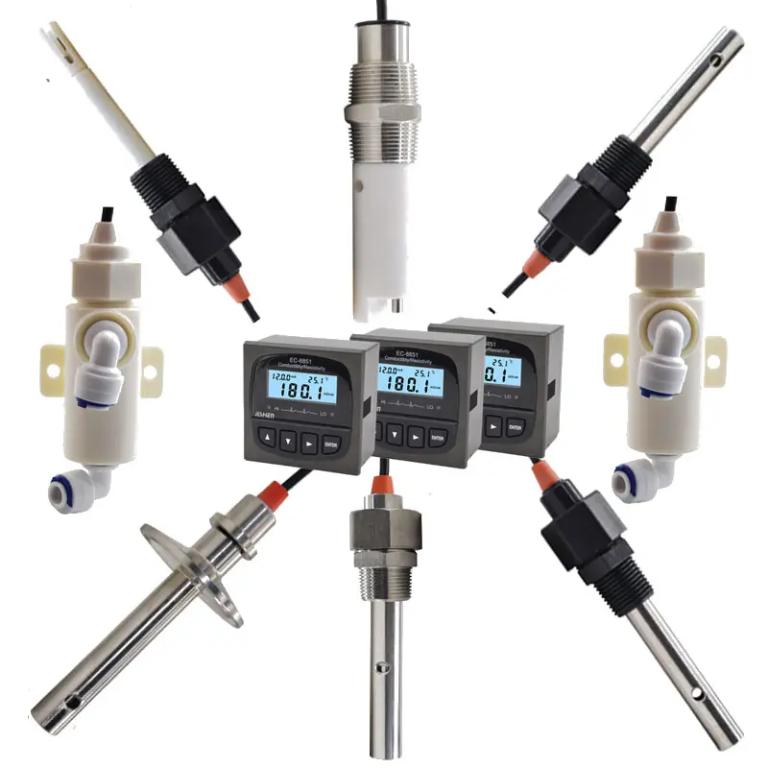
| Model | CCT-5300E series Conductivity/Resistivity/TDS Online Controller |
| Constant | 0.01cm-1, 0.1 cm-1, 1.0cm-1, 10.0 cm-1 |
| Conductivity | (0.5~20,000)uS/cm,(0.5~2,000)uS/cm, (0.5~200)uS/cm, (0.05~18.25)MQ·cm |
| TDS | (0.25~10,000)ppm, (0.25~1,000)ppm, (0.25~100)ppm |
| Medium Temp. | (0~50)℃(Temp.Compensation: NTC10K) |
| Accuracy | Conductivity: 1.5%(FS), Resistivity:2.0%(FS), TDS: 1.5%(FS), Temp.: +/-0.5℃ |
| Temp. compensation | (0-50)°C (with 25℃ as Standard) |
| Cable length | ≤20m(MAX) |
| mA output | Isolated, transportable (4~20)mA, Instrument / Transmitter for selection |
| Control Output | relay contact: ON/OFF, Load capacity: AC 230V/5A(Max) |
| Working Environment | Temp.(0~50)℃;Relative Humidity ≤85%RH (none condensation) |
| Storage Environment | Temp.(-20~60)℃;Relative Humidity ≤85%RH (none condensation) |
| Power Supply | CCT-5300E: DC 24V; CCT-5320E: AC 220V |
| Dimension | 96mmx96mmx105mm(HxWxD) |
| Hole Size | 91mmx91mm(HxW) |
| Installation | Panel mounted, fast installation |
Arduino is an open-source electronics platform that allows users to create interactive projects. By using an Arduino board and some basic components, it is possible to build a simple and cost-effective turbidity meter. This DIY turbidity meter can be a valuable tool for monitoring water quality in a variety of settings, from small-scale water treatment systems to environmental research projects.
The basic principle behind the Arduino turbidity meter is similar to that of traditional turbidity meters. A light source, such as an LED, is directed through a sample of water. The amount of light that is scattered by the suspended particles in the water is then measured by a photodetector. The more particles there are in the water, the more light will be scattered, resulting in a higher turbidity reading.
Building a turbidity meter using Arduino is a relatively simple process that requires only a few components. These include an Arduino board, an LED, a photodetector, a resistor, and some basic wiring. By following a step-by-step guide or tutorial, even those with limited electronics experience can create their own turbidity meter.
Once the turbidity meter is built, it can be calibrated using a series of standard solutions with known turbidity levels. This calibration process will ensure that the meter provides accurate and reliable readings. The turbidity meter can then be used to monitor water quality in real-time, providing valuable data for research or water treatment purposes.

In conclusion, understanding turbidity and its importance in water quality is essential for protecting our environment and ensuring the safety of our drinking water. By building a turbidity meter using Arduino, individuals can take control of monitoring water quality in their own communities. This DIY approach to turbidity measurement is not only cost-effective but also empowers individuals to make informed decisions about water management and conservation.