Table of Contents
Understanding the Basics of water softener valve Connections
water softener valve connections are an integral part of any water softening system. These connections play a crucial role in controlling the flow of water through the system, ensuring that the water is properly softened before it reaches your taps. Understanding the basics of these valve connections can help you maintain your water softening system more effectively, ensuring that it continues to provide you with soft water for many years to come.
Water softeners work by removing minerals like calcium and magnesium from your water, which are responsible for the hardness of the water. This process is accomplished through a process known as ion exchange, where these hard minerals are replaced with softer ones, such as sodium or potassium. The valve connections in a water softener are responsible for controlling this process, directing the flow of water through the various stages of softening.
| Model | Central tube | Drain | Brine tank connector | Base | Maximum power | Operating temperature |
| 2700 | 1.05″ O.D. | 3/4″NPTF | 3/8″ & 1/2″ | 2-1/2″-8NPSM | 74W | 1℃-43℃ |
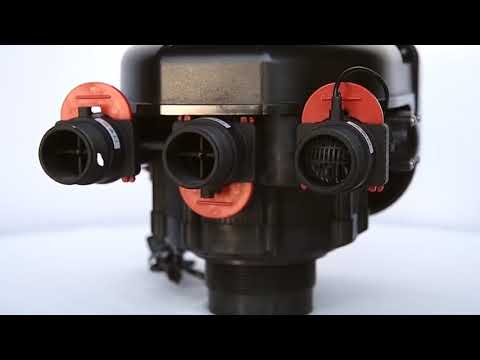
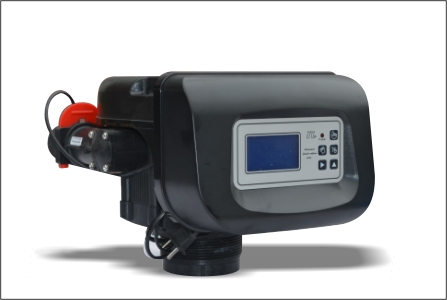
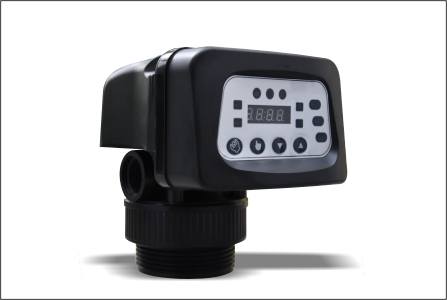
There are two main types of valve connections in a water softener: the bypass valve and the control valve. The bypass valve is a simple device that allows you to divert water away from the softener. This can be useful when the softener needs to be serviced or repaired, as it allows you to continue using your water supply without interruption. The control valve, on the other hand, is a more complex device that regulates the flow of water through the softener. It controls when and how the softening process occurs, ensuring that the water is properly treated at all times.
The control valve is typically connected to a timer or a meter, which determines when the softening process should occur. In a timer-based system, the softening process is scheduled to occur at regular intervals, regardless of how much water has been used. In a meter-based system, the softening process is triggered based on the amount of water that has been used. This can be a more efficient system, as it ensures that the softener only regenerates when necessary, saving on salt and water usage.
Connecting these valves correctly is crucial for the proper functioning of the water softener. Incorrect connections can lead to a variety of problems, including leaks, reduced water pressure, and ineffective softening. Therefore, it’s important to follow the manufacturer’s instructions carefully when installing or servicing your water softener.

In addition to the physical connections, there are also electrical connections to consider. The control valve is typically powered by electricity, and it needs to be connected to a power source in order to function. This should be done by a qualified electrician, to ensure that the connection is safe and meets all relevant regulations.
In conclusion, understanding the basics of water softener valve connections is essential for anyone who owns a water softening system. These connections control the flow of water through the system, ensuring that it is properly softened before it reaches your taps. By understanding how these connections work, you can ensure that your water softener continues to function effectively, providing you with soft water for many years to come. Whether you’re installing a new system or maintaining an existing one, a solid understanding of water softener valve connections is a valuable asset.
Step-by-Step Guide to Installing water softener valve Connections
water softener valve connections are an integral part of any water softening system. They control the flow of water through the system, ensuring that hard water is effectively treated and softened before it reaches your taps. Installing these valve connections may seem like a daunting task, but with the right tools and a step-by-step guide, it can be a manageable DIY project.
Before you begin, it’s important to understand the role of the water softener valve connections. These valves are responsible for directing the flow of water through the softening system. They allow hard water to enter the system, guide it through the resin tank where the softening process occurs, and then direct the softened water back into your home’s water supply.
To start the installation process, you’ll first need to shut off the main water supply to your home. This is a crucial step, as it prevents any water from flowing while you’re working on the installation. Once the water supply is off, you can begin to prepare the area where the water softener will be installed. This typically involves clearing away any debris and ensuring that the area is clean and dry.
| float bed DR-1 | ||||
| Model | DR2-1/ DR2-1 LCD | DR4-1/ DR4-1 LCD | DR10-1 Top Loading | DR10-1 Side Loading |
| Output Max | 4T/H | 7T/H | 15T/H | 15T/H |
Next, you’ll need to install the bypass valve. This valve is used to divert water away from the softener when it’s not in use or during maintenance. To install the bypass valve, you’ll need to connect it to the inlet and outlet ports on the water softener. This is typically done using a wrench to tighten the connections.
Once the bypass valve is installed, you can move on to the next step: installing the water softener valve connections. These connections are typically made using flexible tubing or copper piping, depending on the specific requirements of your water softener system. The inlet valve connection should be connected to the water supply line, while the outlet valve connection should be connected to the line that leads back into your home’s water supply.
However, if you do notice any leaks, you’ll need to turn off the water supply again and check the connections. In most cases, leaks are caused by connections that aren’t properly tightened. If this is the case, simply tighten the connections and check for leaks again.
In conclusion, installing water softener valve connections is a task that requires careful attention to detail. However, with the right tools and a step-by-step approach, it’s a project that can be successfully completed by any homeowner. Remember, the key to a successful installation is ensuring that all connections are securely tightened and that there are no leaks once the water supply is turned back on. With these steps in mind, you’ll be well on your way to enjoying the benefits of softened water in your home.